Foot Taping
Updated:
The following foot taping techniques are designed to support the arch of the foot, improve foot posture and reduce stress on the foot and lower limb during activity. They can be used for both the treatment and prevention of foot and other lower limb injuries, especially those where poor foot biomechanics (e.g. flat feet) are contributing to the condition.
You should discuss the suitability of these taping techniques with your physiotherapist prior to using them. Generally, they should only be applied provided they are comfortable and do not cause an increase in pain, discolouration, pins and needles, numbness, swelling or excessive redness of the foot and toes.
What sort of tape should be used to tape my foot?
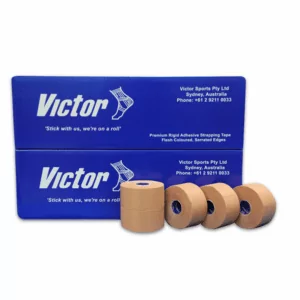
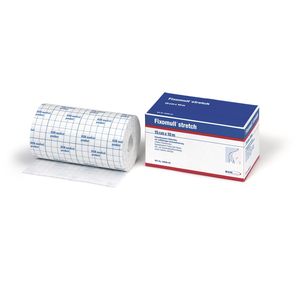
There are many different tapes and bandages available for use by physiotherapists and patients. However, when the purpose is to support the foot and restrict undesired motion, only adhesive, non-stretch (rigid) sports tape is appropriate. (For foot strapping 38mm is usually the most appropriate size). This should always be used in combination with hypoallergenic tape as an underlay, such as Fixomull.

Benefits of Foot Taping
When used correctly, foot taping techniques can:
- Improve foot posture and biomechanics
- Aid healing of foot and other lower limb injuries
- Allow an earlier return to sport or activity following injury
- Reduce the likelihood of injury aggravation
- Prevent foot and other lower limb injuries (such as plantar fasciitis) during high risk sports (such as long distance running).
- Help assess the suitability of orthotics for the individual
Indications for Foot Taping
It is generally beneficial to tape the foot in the following instances:
- Following certain foot or lower limb injuries – Foot strapping may be beneficial following certain injuries (such as Plantar Fasciitis, Achilles Tendonitis or other lower limb injuries where poor foot posture is contributing to the condition). This may be especially beneficial during activities that aggravate or are likely to aggravate the existing condition (this should be discussed with the treating physiotherapist as certain injuries should not be taped – such as some fractures).
- To prevent injury – Foot taping may be beneficial during sports or activities that place the foot at risk of injury (such as long distance running etc.)
- To assess the potential suitability of orthotics – Foot strapping can help to support the foot in optimal posture and can be an inexpensive way to test the likely benefit of orthotics.
When should I avoid Foot Taping?
Foot taping should be avoided in the following instances:
- If you have certain injuries such as some fractures (this should be discussed with the treating physiotherapist)
- If you have a skin allergy to sports tape
- If the taping technique results in an increase in symptoms such as pain, ache, discolouration, pins and needles, numbness, swelling or excessive redness of the foot or toes.
- If you have sensory or circulatory problems
Weaning off foot tape in general activity is usually recommended as strength, range of movement and function improves and symptoms reduce. In these instances though, taping during high-risk activity (such as some sports) is usually still recommended. If foot taping successfully reduces symptoms then a review with a Podiatrist for the prescription of orthotics and general footwear advice is usually indicated.
Foot Taping Techniques
The following taping techniques may be used to provide support to the arch of the foot and improve foot posture. Generally it is recommended that the foot is shaved 12 hours prior to taping (to prevent painful removal of hairs and skin irritation). The skin should be cleaned and dried, removing any grease or sweat. Low irritant Fixomull tape should be applied as an under-wrap to reduce the likelihood of skin irritation with rigid sports tape over the top of this. Some or all of these taping techniques may be applied to tape the foot and provide the support required for the individual.
Forefoot Anchor
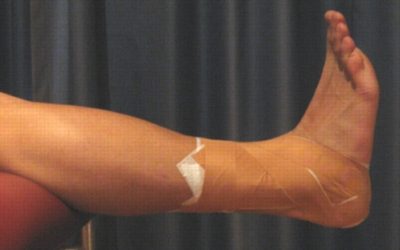
Place a complete loop of tape around the foot, just before the toes (figure 1). This should be applied gently to prevent circulatory problems and is used as a fixation point for the other foot taping techniques.
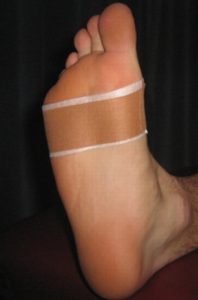
Figure-of-6’s

Members Only ContentBecome a PhysioAdvisor Member to gain full access to this exclusive content. For more details see Become a Member. Already a member? Login Now
Diagonal Lines
Members Only ContentBecome a PhysioAdvisor Member to gain full access to this exclusive content. For more details see Become a Member. Already a member? Login Now
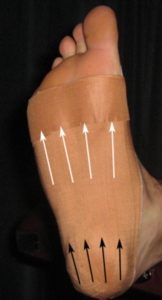
Straight Lines
Keeping the foot and ankle relaxed, start the tape at the back and bottom of the heel. Begin this taping technique by following the black arrows (figure 4) and conclude this taping technique at the level of the forefoot anchor by firmly following the white arrows (figure 4). Fan the tape out as demonstrated, with each line of tape overlapping the adjacent layer by approximately 50%. Do 3 – 5 straight lines depending on the size of the foot and the amount of support required.
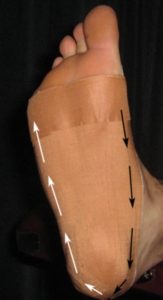
Heel Anchor
Place a strip of tape around the border of the foot. Begin this taping technique at the level of the forefoot anchor at the inner aspect of the foot by following the black arrows and conclude this taping technique by following the white arrows (figure 5). This should be applied gently to prevent circulatory problems and is used as a fixation point for the other foot taping techniques.
Basic Foot Taping Recipe
Members Only ContentBecome a PhysioAdvisor Member to gain full access to this exclusive content. For more details see Become a Member. Already a member? Login Now
Complete Foot Taping Recipe
Members Only ContentBecome a PhysioAdvisor Member to gain full access to this exclusive content. For more details see Become a Member. Already a member? Login Now
Removing the tape
Care should be taken when removing the tape to avoid injury aggravation or skin damage. Blunt nosed tape scissors should be used. The tape should be removed slowly, pulling the tape back on itself with pressure placed on the skin as close as possible to the line of attachment of the tape.
Generally tape should be removed with 48 hours of tape application or sooner if there is any increase in pain or symptoms (including skin irritation or itchiness).
Foot Taping Summary
Members Only ContentBecome a PhysioAdvisor Member to gain full access to this exclusive content. For more details see Become a Member. Already a member? Login Now
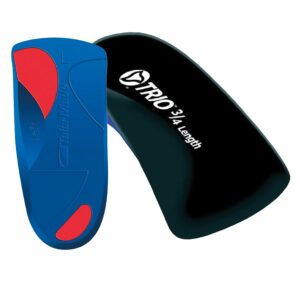
 Physiotherapy Products for Foot Strapping & Rehabilitation
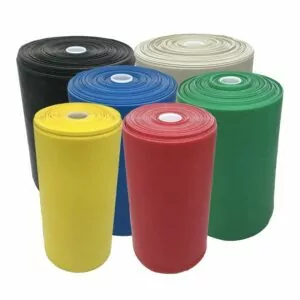
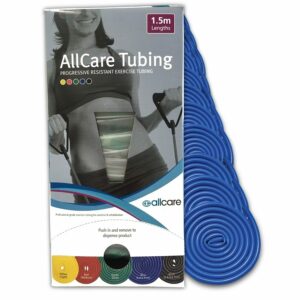
To purchase physiotherapy products to assist with Foot Taping click on one of the above links or visit the PhysioAdvisor Shop.
 Foot and Ankle Exercises
- View Ankle Stretches.
- View Ankle Strengthening Exercises.
- View Balance Exercises.
 Other Taping Techniques
 Find a Physio
Find a physiotherapist in your local area who can help with Foot Strapping.
Become a PhysioAdvisor Member
-
 Individual Membership (12 Months)$59.95 for 1 year
 -
Individual Membership (3 Months)$39.95 for 3 months
-
Individual Membership (Yearly)$49.95 / year
-
Individual Membership (Monthly)$15.95 / month

Link to this Page
If you would like to link to this article on your website, simply copy the code below and add it to your page:
<a href="https://physioadvisor.com.au/health/taping-techniques-lower-body/foot”>Foot Taping – PhysioAdvisor.com</a><br/>PhysioAdvisor offers detailed physiotherapy information on foot taping and foot strapping techniques including Low Dye Taping for excellent foot support.
Return to the top of Foot Taping.